Sunday, July 29, 2012

27 Things Update!

With our wedding coming up in exactly 68 days (eeee!), I've been a bit preoccupied and have neglected my blog more than I would like-- but I suppose that's life! Yesterday was Kyle's birthday and as we reflected on the past year of his life, it got me to start reflecting on mine as well.

My birthday isn't until October but since I haven't revisited my "27 Things" list since... well... since I wrote it, I thought I'd review it to see if I've actually gotten anything accomplished. I was shocked to see how much I've done even without referring to the list much at all.


So let's briefly review, shall we?

#2- Start Skyping: I started skyping following my video interview with Right-Brain Business Plan creator, Jennifer Lee. Getting all set up and chatting with Jenn was super fun and easy!

#3- Lead a Workshop: Back in June I led my first Right-Brain Business Plan Workshop! I still haven't posted about how it all went (wow, I am slacking, aren't I!?) but it was a lot of fun and a HUGE learning experience for me. More details to follow in a future recap post.

#5- Re-launch MoKoPo: I'm not sure what my initial goal was with this one. At the end of last year sometime I did revamp my website and switched to a different platform, Virb.com, for my MoKoPo main site. But, I'm already bored with this one and I plan to "re-launch" MoKoPo again (and probably again and again...) in the future.

#8- Make a Video of Me Painting: This one was a lot of fun to do! Like most creative projects I take on, I knew exactly what I wanted to do (paint an entire piece on video, then speed it up as a progression and set it to music), but I didn't quite know how to go about doing it. I used my Flip camera, and just "winged" it (no pun intended, haha). It ended up taking a lot longer than I thought with all the cropping, editing, and compiling I had to do but I was really pleased with how it turned out. You can see the finished project here: Butterfly Progression

#9- Complete a 10-Day Juice Fast: I put "not quite" by this one because after watching "Fat, Sick, and Nearly Dead" on Netflix, Kyle and I had big ambitions to complete our own fast. In the movie they did 60-days but we decided to be a bit more realistic and shoot for 10-days. We totally underestimated how hard it would be and barely made it a day after choking down our disgusting juice concoctions. Since the first juice fast debacle, and using some guidance from the lovely Lacy Young, I regrouped and completed a 3-day fast and felt great! I am now hooked on juicing and always turn back to it when I'm feeling a bit sluggish or when my eating habits have been less than stellar.

#12- Start a Vegetable Garden: We built a 4'x8' garden bed in our backyard and planted some veggies in early summer. After a few days, they were all dried and shriveled and we thought for sure they were dead. But, we kept at it, making sure they were well watered everyday and after a few summer rain showers they are growing and blooming like crazy! We are so thrilled! We are currently growing grape tomatoes, roma tomatoes, strawberries, basil, acorn squash, zucchini, onions, and spinach. Our cucumbers, garlic, and broccoli didn't make it (R.I.P.)

#13- Go Vegan For a Week: This was much easier than I ever thought! I went a least a few months completely vegan and although I have since had meat or cheese occasionally, I'm looking forward to a getting back to a cleaner diet. Even though we'll enjoy an occasional burger or chicken on our salad when we eat out, we don't keep any meat or dairy in our house which helps us to eat better at home.

#20- Wreck a Journal: I purchased my "Wreck This Journal" book at a local bookstore (Blue Manatee Books) and started it's destruction. I find it difficult to keep at it because I sometimes forget I have it. But, it's a process and I'm in no hurry to finish it.

#22- The "Inspired Snail" Project: When I first came up with this idea, it was a totally different concept involving postcards and secret messages. However, as I kept getting more and more questions about the business side of being a creative entrepreneur I decided to start a different blog to put all that info. and I liked the name "Inspired Snail" so much I decided to name the new site that. You can visit Inspired Snail here: http://inspiredsnail.com

#26- Take Photobooth Pics with Kyle:

#27- Write an E-Book: I have a few e-books in the works (slowly but surely), but I did put together a mini-ebook that you get for free when you sign up for the Inspired Snail newsletter!

Just a few short months to finish the rest. We'll see how it goes! :)

Wednesday, June 20, 2012

Wednesday Wishlist

Wrapped Fox Shirt by dandyrions
Happy Snail Necklace by marymaryhandmade
Tea Drinkers Sidekick Mug by AngelaIngram
Ceramic Coaster by mayagencic

Tuesday, May 22, 2012

Super Fun Interview with Jennifer Lee!

Today was a fun day! I had the fantastic opportunity to be interviewed by one of my favorite creative geniuses, Jennifer Lee, author of the Right-Brain Business Plan. We chatted about creative entrepreneurship, my new website Inspired Snail, selling on Etsy, and my upcoming workshop! The video replay can be seen below!

Also, in honor of our discussion about finding your Creative Cohorts, from now until May 26th I am offering an additional $20 OFF my workshop when you register with a buddy, making the $187 workshop only $147! Round up your buddies and come join the fun!!

Watch live streaming video from rightbrainbusinessplan at livestream.com

Saturday, May 19, 2012

ONE WEEK LEFT to Register at a Discount!!

Early Bird Registration for my upcoming Right-Brain Business Plan Workshop ends on May 26th!! 
Don't miss out on this fun, hands-on, business-building experience!


Visit MoKoPo.com/Workshops for more info and to register!

Wednesday, April 18, 2012

Wednesday Wishlist

Smokey Quartz Extra Long necklace by RachaelRyen
Wild and Precious Life Greeting Card by thewheatfield
Neon Aztec Faux Leather Earrings by lovesexton
Vernazza Cinque Terre Italy 5x7 Photo by TiffanyDawnPhoto

Friday, April 6, 2012

Tinkering with Adobe Illustrator + a FREE PRINTABLE!

Hi Friends! Happy Friday!

Just popping in to try something a little different. My next big investment for the business will be Adobe Illustrator. It's kind of crazy just how much I've been able to accomplish business-wise with good ole MS Paint but as my plans for the biz get bigger, so must my arsenal of tools.

I just downloaded a trial version of Illustrator today and although I have pretty much no clue what I'm doing, I'm already in love. It is so amazingly versatile and I can't wait to explore all that it has to offer.

To kickoff this exciting new adventure, I decided to challenge myself to a mini-task: Create a 5x7 image, make it a .pdf file, and make it a free printable for you guys, my lovely readers.

So! Here it is!
Click the image to download a .pdf file, print, and enjoy!


Hopefully, if it works as it should, you can click on the image above and print out your very own 5x7 bunny doodle just in time for Easter! Feel free to share with your friends by sending them the link to my blog, and I welcome any and all feedback on whether this works and how easy/hard it is for you guys.


Enjoy!!

Tuesday, April 3, 2012

Today I spent the day dreaming with my love...

Make it Happen Art Print by wickedpaper
To Be Brave Art Print by maechevrette
Let's Go Anywhere Art Print by thewheatfield
Vast and Amazing Art Print by FreyaArt

Monday, March 26, 2012

My DIY Wedding: "Will You Be My Bridesmaid?"

DIY Wedding Ball Mason Jars Bridesmaid Kit


As many of you know, I am engaged and in the process of planning a wedding to take place in October 2012. Kyle and I are both SUPER laid-back about most things in life so our wedding is no different. This is good for our stress levels, however I am also very aware that our slow-paced planning is going to sneak up on us and my head will likely explode in a few months so we (finally) have started to get the show on the road.

Being that my response to most projects is, "Oh, I can just make that", we knew from the get-go that our wedding would be mostly DIY. Not only does it cut down on cost, but also-- and most importantly to us-- making everything ourselves allows us to make it truly our own and an expression of ourselves. We are adamant that everything we plan for our big day will have meaning to us, and that nothing will be done just because "that's what you're supposed to do". Tradition Shmadition.

First on the list of DIY Wedding Projects is the task of asking my girls to be in my wedding. I have girls scattered all around (California, Arkansas, Cincinnati, Columbus) so I knew I wanted to ask them via a gift, as opposed to asking them to dinner or something which wasn't a possibility for everyone.

As I was browsing the inspirational wonderland that is Pinterest, I came across this lovely post. I knew immediately that it was something I wanted to do-- a little kit of inspiration for each of my girls.

We have a couple of motifs decided for the wedding including Ball Mason Jars (my future married name will be "Megan Ball" so it's very fitting), pennant flag bunting, our colors, and a hand-drawn doodle heart with our initials. I wanted to include all of these things in their kit so they could get a better feel for what the wedding day will be.

First, I cut the pennants out of cardstock and hot glued them to string to make the banner. I also wrote "Will you be my bridesmaid?" on a strip of ribbon and collected some goodies to include in their jars. Goodies included a bundle of paint chips to show our colors, photos of dress and flower inspiration, and a little stamped heart.

DIY Wedding Ball Mason Jars Bridesmaid Kit

The hand-carved stamp was a purchase from the Doodlebug Design Etsy Shop. I love it and have used it for a number of wedding projects so far!

DIY Wedding Ball Mason Jars Bridesmaid Kit
I also wrote out a couple of pages about who is in the wedding party, what the day will be like, what dresses they should wear, and what their role as bridesmaid will be. (Spoiler Alert: all they really have to do is show up, look gorgeous, and have a blast!).

The "My Girls" page was a lot of fun because I gave them each a superlative a la high school yearbook such as "Most likely to sob uncontrollably" and "Most likely to spike the punch".

Then, I put them all in the jar, lined the jar with kraft paper to hide the goodies inside, attached the ribbon to the lid, and hung the bunting around the outside.
DIY Wedding Ball Mason Jars Bridesmaid Kit
 Voila! A question, a present, and inspiration all in one jar! What do you think?

Do you have a story of how you asked your wedding party to be a part of your wedding day? I'd love to hear them! Leave me your memories in the comments below!


Sunday, March 25, 2012

Registration NOW OPEN for the Right-Brain Business Plan® Workshop 6/9/12!

The Right-Brain Business Plan® Workshop
Saturday June 9th, 2012
9:00AM-5:00PM
Newport on the Levee

The Right-Brain Business Plan®: Turn Your Passion into Profit

Do you know where your business is heading in 2012 and beyond? Want a fun and creative way to plan for your amazing entrepreneurial success? Then come join the party at the Right-Brain Business Plan® workshop! You'll roll-up your sleeves and craft a visual plan that lets your head know where your business is going AND inspires your heart to sing with joy.

This fun and interactive workshop is perfect for you if…

  • You don’t have a business plan and know you need one, but doing dirty dishes, dealing with loads of laundry, or even getting a head start on next year's taxes all sound way more appealing (ugh!)
  • You've tried to do a business plan the "traditional way" and you got stuck, overwhelmed, and demotivated
  • You already have a business plan, but you need to breathe new life into it
  • You can't stand spreadsheets
  • Numbers numb you out
  • AND you’d be a heck of a lot happier planning your business in the same intuitive, authentic, and expressive way that you live your creative life (yes, indeed, it can be that fun and fulfilling!)

You get the following (and much, much more!) from this workshop:
  • Detailed, do-able assignments… that deal with all the parts of a business plan, from start to finish
  • Intuitive exercises and inspiring materials… that tap into your natural creative genius, transforming drudgery into joy
  • Hands-on support, guidance, and accountability… from a licensed facilitator plus the wisdom and perspectives of your fellow creative cohorts in the circle
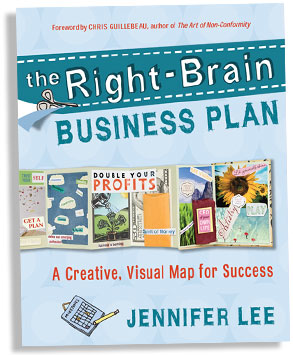
  • A copy of the best-selling book The Right-Brain Business Plan: A Creative, Visual Map for Success by Jennifer Lee
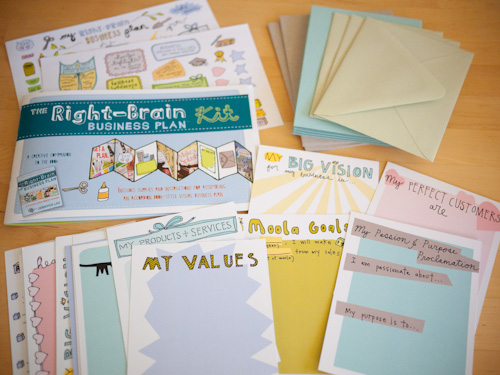
  • Your very own Right-Brain Business Plan Kit including an accordian-style book, stickers, envelopes and other fun goodies
  • Light snacks and beverages on the day of the event

By the end of this workshop, you will have learned how to:

  • Clarify your business values and vision
  • Paint a picture of your business landscape
  • Determine what products and services you'll offer
  • Understand your competition, and what makes you stand out from the crowd
  • Identify who your perfect customers are and how you'll reach them
  • Set and manage money goals that honor your values and align with your life
  • Select your circle of support to help you get the work done
  • Map out concrete action steps to bring your Right-Brain Business Plan® to life
Ready to jump right in?? 
Registration for the full-day course and materials is $187
Sign up before May 26th for only $167! 


What people have said about the Right-Brain Business Plan®:

 “This course helped me re-energize and align my vision, purpose and actions. In fact, engaging in this class got me so inspired again about my business that I found myself in action implementing my plan while simultaneously creating it! Results are already materializing.
— Amy Egenberger, Spirit Out!, Inc, www.spiritout.com

“Approaching the writing of a business plan with a right-brain creative aspect makes it less intimidating and more inspiring. It certainly isn’t boring! I think the creative approach makes it more personal.

The best aspect for me in this class is feeling that I have a better direction for my business. It pushed me to move in a direction that I’ve been contemplating for almost a year.”
—Amy Crawley, Amy A. Crawley Fine Art, www.amyacrawley.com

“I’ve written business plans before, but this helped me do it in a way that let me stay in the right mindset for the project. The old ways felt like trapping the creative flow in false structure that misled me. But my Right-Brain Business Plan® not only provides structure, it provides inspiration and puts me in the right (ha!) mindset.”
—Tori Deaux, The Circus Serene, www.circusserene.com

“I definitely appreciate the fact that this course emphasizes and acknowledges how important visuals are to the right brain person. This concept really helps me stay focused and interested in the planning process of my business. Phew! This is the furthest I have ever gone in the planning process. I typically don’t make it past reading the two words, ‘executive summary’.
— Lisa Hause, Lisa Hause Photography, www.lisahause.com

“If you don’t have a plan for your business, you need one. If you want to have fun learning how to develop a plan, take this course. This course takes the ‘scare factor’ out of creating a business plan.”
—Tracey Asai, Tracey Asai Designs, www.traceyasaidesigns.com

"YES! All of those things sound FANTASTIC!" 


Still unsure? Here are some Frequently Asked Questions

What if I don’t have any idea about what business I want to start?

The workshop is most effective when you have some sense of what type of business you want to start. If you know you want to be starting a business, but are not quite sure what to pursue and are still in the very early exploration stages, you might want to consider working with a life coach first to get clearer on what’s next for you. You can also download the free guided visualization at http://www.rightbrainbusinessplan.com/download-signups and listen to it to see if that helps you start to get clear about the business you’re wanting to create.

What if I have more than one business?

I know many creative entrepreneurs have a plethora of passions. If you have multiple businesses or business ideas, I suggest focusing on one business as you go through the exercises. It will keep things more simple and manageable for you. Once you go through the process for one business, it’ll be easier to repeat it again for the next. When you’re done you can look at both plans to see the big picture of your creative enterprise.

What can I expect from the course leader?

Think of me as your friendly companion and ally who will guide you through the creative business planning process. I’ll offer lots of passionate inspiration along with practical information. I’m there to answer your questions as best I can, point you to additional resources, challenge you to stretch yourself, and facilitate group sharing and learning.

How can I get the most out of this experience?

Show up: Engage yourself fully in the process. Participate in the exercises and discussions. The more you put in to this experience, the more you’ll get out of it.

Be curious: Ask questions and be willing to try new things, learn, and venture outside your comfort zone.

Offer feedback: If something isn’t quite working for you in the workshop, please let me know, offer a suggestion, and/or make a specific request and I will do my best to address your concern. This is a two-way street and we’re co-creating our experience together, so I invite your insights.

What if I can no longer participate in the workshop and need to cancel?

The workshop registration fee is non-refundable. But, if for some reason you cannot attend, you can transfer your spot to another person before the workshop begins or you can use your registration fee as credit toward a future offering of this workshop.

Who can I contact if I have more questions?

Please e-mail your questions about the workshop to me, Megan Peters, at mokopo@gmail.com and I'll get back to you soon!


Workshop investment: $187 $167 until May 26th! Workshop limited to 15 people

Meet Your Facilitator

Hello! I am Megan Peters, an artist, massage therapist, entrepreneur, blogger, creative spirit, and jill-of-all-trades.

Being a multiple business owner, I understand the importance of having a plan and goals to keep your business moving in the right direction. However, as a right-brainer I often struggled with the details. I am an intuitive, visual person and dealing with all of the numbers and projections was driving me crazy!

In 2011, I stumbled upon Jennifer Lee's Right-Brain Business Plan and fell instantly in love. It was exactly what I needed to stay organized and on track as a business owner while managing to remain engaging, thought-provoking, and -- dare I say -- FUN!

So when Jennifer offered, I jumped at the opportunity to become a licensed facilitator. I am beyond thrilled to be able to work with fellow right-brainers who have creative business dreams and are just looking for a place to start!

I'll be there for you as a guide through the program, a creative cohort to bounce ideas off of, a question-answerer and resource-provider, and as a new friend.
I can't wait to meet you!


Right-Brain Business Plan® is a registered trademark of Jenn & Brian Creative, Inc. (DBA: Artizen Coaching).  Learn more at www.rightbrainbusinessplan.com.

Wednesday, March 21, 2012

Can't Wait Til Tuesday Progression

I'm thrilled to announce a new spin on my "Tuesday Progression" series-- VIDEO progressions!! I was far too excited to wait until Tuesday to share it with you though, so here it is! Enjoy!

Wednesday, March 7, 2012

Wednesday Wishlist

Classic Baby Blue Couch by namedesignstudio
Streetview Painting by sidorovart
Handmade bifold wallet by cottonpurr
Bunting Gift Tags by RainyDayColors

Tuesday, March 6, 2012

Work In Progress

Any guesses what it might end up being? Hint: This springlike weather has me floating on air...


Sunday, February 26, 2012

Seriously Excited About Tomorrow!


If you've ever felt intimidated, overwhelmed or trapped by the way you think you "should" be running your business, you're going to get so much out of the free Right-Brainers in Business Video Summit which runs February 27th through March 9th.

Jennifer Lee, author of the best-selling and award-winning book The Right-Brain Business Plan, has gathered 10 entrepreneurial leaders to give you the expert answers and resources you need to take your business more seriously (while still having lots of fun!).

I participated in this event last year and it really kickstarted my business. The speakers are so knowledgeable and passionate about what they do that it is impossible not to leave feeling the same passion about your business!

Grab your Free pass here: FREE PASS

Starting this Monday, you'll learn from folks like:
  • Mark Silver, founder of Heart of Business, who will share secrets to authentic, heart-based pricing and selling
  • Lindsay Wilson, founder of Social Media Heaven, who will teach you what you really need to know about making sales using social media
  • Tara Gentile, creative business coach, will discuss the art of earning
  • And more!


This event is going to be amazing! And to top it off, if you upgrade to a Booster or Premium Pass by Monday, February 27th you'll get a special bonus gift: The Soladex (valued at $89), a must-have guide in every entrepreneur's digital library which has the very best referrals, resources, and services you need to do your next product launch, manage a virtual team, or kick your online marketing into high gear. Simply click on the link above and go to the "Upgrade" tab!

So not only will you get unlimited access to watch the summit recordings and have opportunities for extra support through group coaching, by upgrading you'll get a valuable guide that takes care of all the legwork for you so you don't have to waste your time needlessly searching for the tools and help you need to grow your business.

But you'll need to act now to snatch this goodie up! By the end of Monday, February 27th this super special bonus gift will long gone (and your big ideas will just be getting started!).

I hope to see you all there!

Wednesday, February 22, 2012

Studio Tour

Today was spent tidying my workspace at home. I am lucky enough to have an entire spare bedroom dedicated to my art studio. However, since it is the home of all of my creative energy, it can get very messy and cluttered very quickly. Nothing re-energizes me more than getting things organized and in their place.

I have done a lot of growing and learning this past year and MoKoPo has transformed from a "Hmm, I wonder if I can do this" dream to a "This is my passion. This is my career. It is happening" reality.  With that, it was very important for me to create a workspace that allows for serious productivity-- a place where I can lock myself in for the day and create to my heart's content. You might remember my modest little set up from my post at the end of 2010 here. What a transformation, huh?! 


I have three main "stations" in my studio. I have a "business and blogging" station that houses my calendar, computer, and office supplies, a "crafty" station that is a clean, open counter space used for assembling things, packaging prints, etc., and a "get messy and create" space where all the magic happens.

I designed and assembled my desk space using mostly products from IKEA (uhh, LOVE ikea!). It was important to me to have lots of counter space, lots of storage space, and that the desk utilized as much space as possible in my small room.
  

To create the desk, I used one large Expedit bookcase turned on it's side for the left end piece, and two small Expedit bookcases for the middle and right end pieces.

The desktop is actually composed of two separate Vika Amon table tops laid across the three bookcases (they meet in the middle of the center bookcase). To keep them from sliding around, I attached them to the bookcases with a strip of adhesive velcro. Works like a charm!

Note: The bookcases are slightly deeper than the table tops which wasn't a big deal to me. I just slid the table tops all the way toward the front of the bookcases so that they were flush in the front. The small gap at the back (against the wall) allows me to run my computer cord up the wall, behind the desk, and into my laptop to charge.


I do most of my painting at this desk, also purchased at IKEA (called the "Vika Blecket Drawing Desk") The desk is able to be tilted up at the back and used as more of a drafting table, but I usually just keep it flat and work from there. I have a small, portable, plastic slanted surface that I can use if I need a drafting type of space (in this photo it is what the 4 red canvases are sitting on).

I've had this desk for years and I've just accepted the fact that it is my work area and it WILL get messy. I gave up trying to keep it clean (notice all the paint on it?) and it's so much less stressful to create without feeling like I have to restrain myself for the sake of staying tidy.


In this room I have one closet which houses all of my blank canvases, some finished canvases, shipping supplies, and my prints.

Behind the entry door I have a hanging shoe organizer where I store all of my soft materials like t-shirts, tote bags, etc., as well as the small canvas journals I paint occasionally


Behind my desk is a giant pegboard wall. I started using pegboard as part of my art show display (seen here) and I loved its versatility so much that I knew I needed it in my studio as well! This is where I keep the supplies I need most often (paints, brushed, pens, etc.) so they are always within easy reach.


Once again, the small white shelves that hold my paints were purchased at IKEA. They are called the "Ribba" photo ledge. Instead of using screws, I simply hung them up with pegboard hooks through the shelves' pre-drilled holes. Luckily, I already had these shelves-- they can be seen holding my finished canvases in my old studio set-up.


The containers holding my pens, markers, and brushes are called "Asker" containers. Other items are hung up with general pegboard accessories found at any home improvement store. I actually bought a giant assorted pack of hooks at Big Lots for a good deal. The long skinny pegs are great for hanging scissors and store-bought items that have hanging tabs already in the packaging (in this case, colored pencils, doilies, etc.) Two of my larger paintbrushes are hung up using double hooks meant for things like screwdrivers. 


Since I'm ALWAYS in need of paper towels to dry my brushes and to clean up unfortunate paint spills, I decided to rig a hanging device so they are always on-hand. I just used a little bit of rope, tied two loops at the ends, and strung it through the roll to hang it on the desk's screws. Easy peasy!


And on a final note, I want to mention that if you go to IKEA to do some shopping for your own studio, be sure to check out the "As-is" section near the checkout of the store. This is the place where they put all sorts of defective, returned items that are often drastically discounted.

I found this returned piece of kitchen cabinetry originally intended to hold and sort plates. Now I use it as a place to organize all of my prints and keep them from getting damaged. Be sure to think outside the box!

So that's it! What do you guys think? Have any favorite parts of my studio? What about your own creative workspace solutions? I'd love to hear about them-- please share in the comments below!

Also, if you have any questions about items in my studio (where I got them, how I set them up, etc.) don't hesitate to ask! I'm an open book!